Build a TypeScript CRUD App with Bun
This recipe builds a Books CRUD module in the Reepolee project you created during Installation. Run the commands below from that project's root folder.
Books is a final table that users with the user module can edit. The completed resource includes a searchable and paginated list, create and edit forms, server-side and live validation, and translated labels.
The point isn't to teach you SQL - it's to show how the pieces of Reepolee fit together. By the end, you'll have a feel for the database-first workflow that the rest of the framework is shaped around.
Total time: about 15 minutes if you're following along, less once you've done it twice.
Step 1: Define the Schema
Open the shipped incremental file sql/sqlite/06-init-books.sql (or its MySQL counterpart). It contains the Books table and demo rows:
DROP TABLE IF EXISTS books;

CREATE TABLE books (
    id INTEGER NOT NULL PRIMARY KEY AUTOINCREMENT,
    title TEXT NOT NULL,
    author TEXT DEFAULT '' NULL,
    isbn TEXT DEFAULT '' NULL,
    published_on DATE DEFAULT NULL,
    is_in_stock INTEGER DEFAULT 1,
    created_at DATETIME DEFAULT current_timestamp,
    updated_at DATETIME DEFAULT NULL
);

CREATE INDEX books_title ON books(title);
CREATE UNIQUE INDEX books_isbn_unique ON books(isbn);

CREATE TRIGGER books_update_timestamp
AFTER UPDATE ON books
FOR EACH ROW
BEGIN
    UPDATE books SET updated_at = current_timestamp WHERE id = NEW.id;
END;

INSERT INTO books (title, author, isbn, published_on, is_in_stock) VALUES
    ('Pride and Prejudice', 'Jane Austen',  '978-0141439518', '1813-01-28', 1),
    ('Dune',                'Frank Herbert', '978-0441172719', '1965-08-01', 1),
    ('The Left Hand of Darkness', 'Ursula K. Le Guin', '978-0441478125', '1969-03-01', 0);
A few of the conventions matter for the generator:
id INTEGER NOT NULL PRIMARY KEY AUTOINCREMENT- the standard primary key shape Reepolee expects.is_in_stockstarts withis_- the generator recognises it as a boolean and renders it as a Yes/No select. SeeBOOLEAN_PREFIXES.published_onends with_on- the generator applies the date codec automatically (DATE_SUFFIXES).created_at/updated_atplus the trigger - the generator excludes them from form schemas and the list view edits them as read-only timestamps.- The unique index on
isbnlets the generator surface a "duplicate" error message when you try to add two books with the same ISBN. - The seed
INSERTrows give the generated list page something to display on first load. Drop them later when you have real data.
Step 2: Initialise the Database
Apply only the incremental Books file. Use bun reeman -> "Run SQL file", or for SQLite:
sqlite3 app.db < sql/sqlite/06-init-books.sql
That drops and recreates every table the file defines, then inserts the seed data. The app.db file now contains the books table with the three seed rows. Start the dev server (bun dev) and the application picks up the new tables on its next query.
Step 3: Generate the Resource
In a second terminal:
bun reeman crud books --prefix user
The user prefix is part of the authorization story: generated files go under apps/main/user/books, the browser URL is /user/books, and the route definition requires the user module.
The generator writes a complete CRUD module to apps/main/user/books/:
apps/main/user/books/
├── config.ts                   ← user-editable column and route settings
├── schema.generated.ts         ← types and field metadata (regenerated from the DB)
├── validation_server.ts        ← user-editable Zod schemas
├── index.ts                    ← route handlers
├── sql.ts                      ← database queries
├── index.ree                   ← list template
└── form.ree                    ← create / edit template
The generator adds the books route-definition export to apps/main/routes.ts (using the declarative RouteDefinition shape):
import { build_nav_routes, build_routes, type RouteDefinition } from "$lib/route_builder";
import { try_load_routes } from "$lib/route_module";
import { home_page } from "$main/home";

import { auth_crud } from "$platform/auth";
import { route_definitions as system_routes_definitions } from "$reeman/system_routes";
import { route_definitions as user_books } from "$main/user/books";

const route_definitions: RouteDefinition[] = [
    // Pages
    { url: "/", handler: home_page },
    ...await try_load_routes(import.meta.resolve("./examples")),

    // SYSTEM
    ...system_routes_definitions,

    // GENERATED
    ...user_books,
];

export const nav_routes = build_nav_routes(route_definitions);

export const routes = {
    ...build_routes(route_definitions),
    ...auth_crud,
};
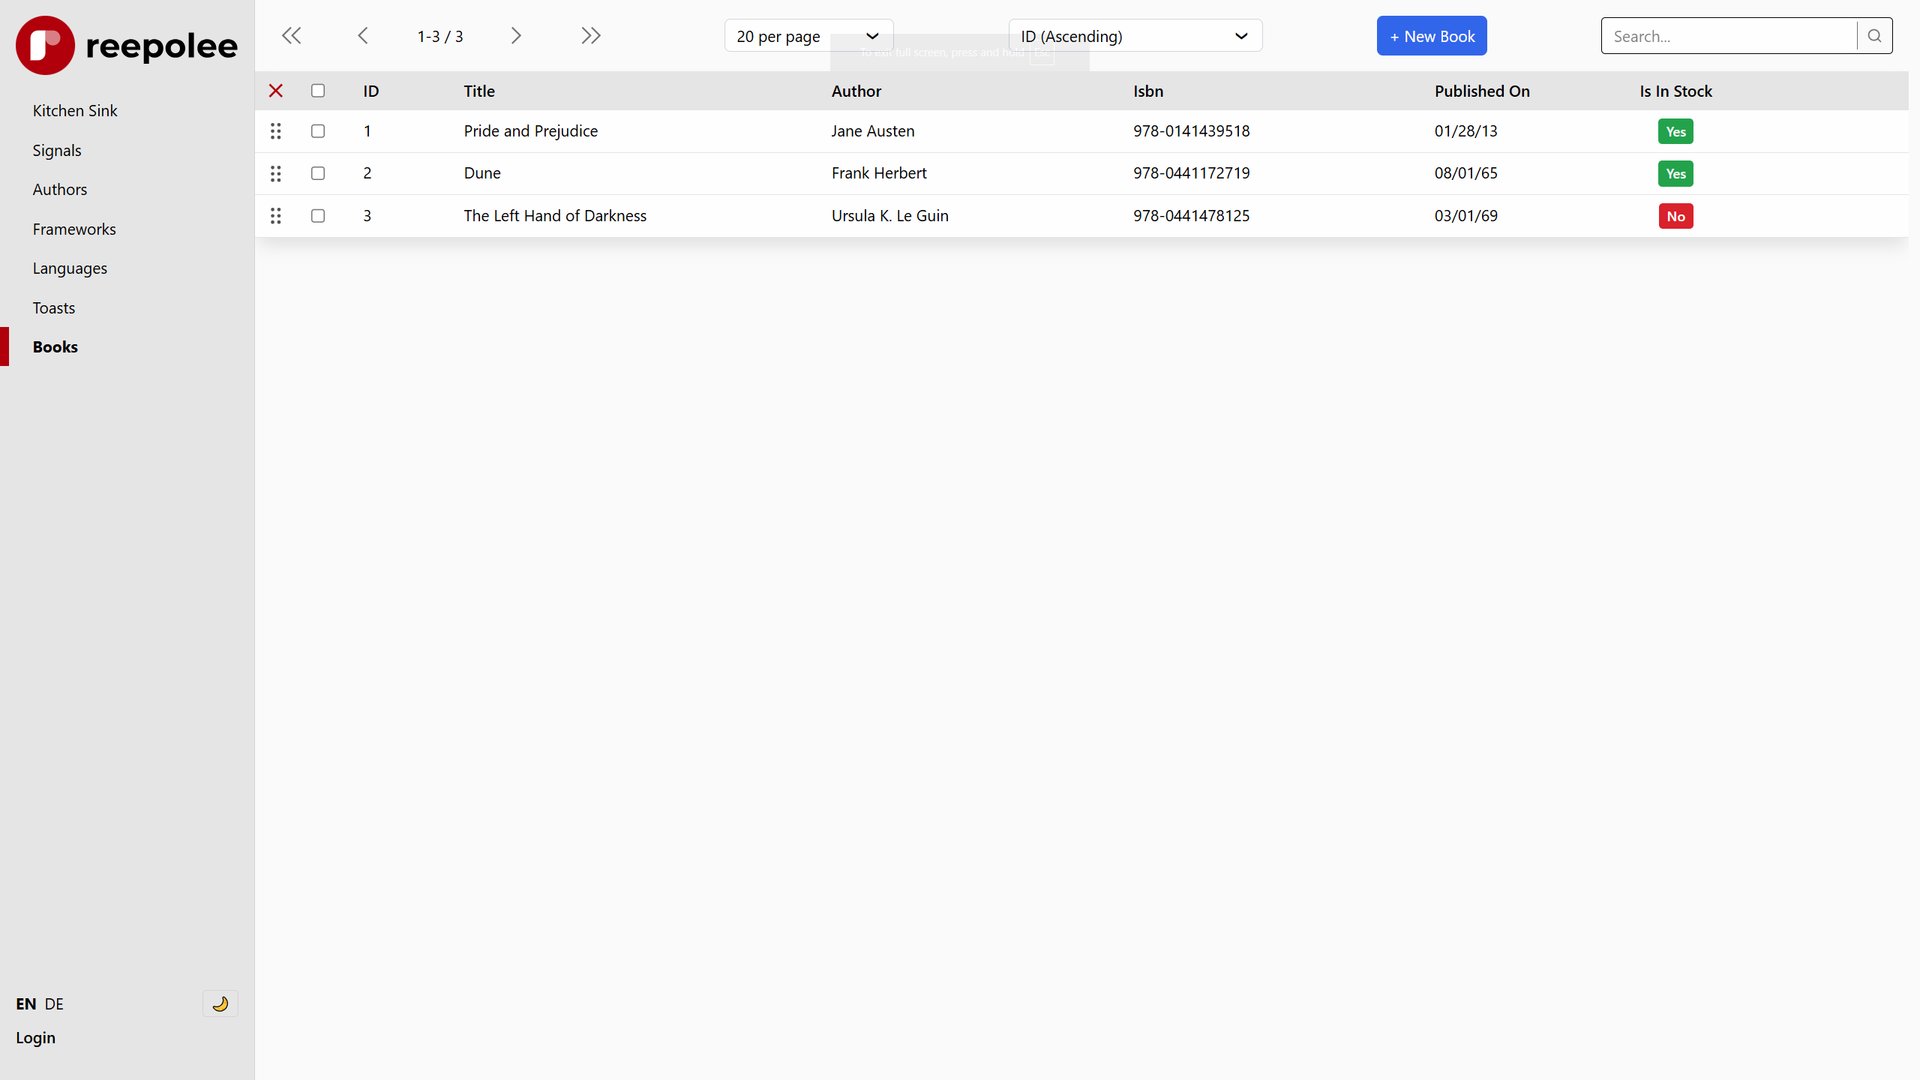
The dev server picks up the new files and re-registers the routes. Sign in as Alice or Bob and visit http://localhost:2338/user/books:
- A list page with the three seed rows, search, pagination, and per-page-limit dropdown.
- "New" button ->
/user/books/newfor adding a record. - Each row's edit link ->
/user/books/:id/editfor updates. - The toast confirmation after saves.
That's a working CRUD module in three commands.
Step 4: What Was Generated
Open apps/main/user/books/index.ts to see the generated CRUD route table and handlers. Its internal paths are mounted under /user by the route definition:
export const user_books_crud = {
    "/books": { GET: get_books_index, POST: post_books_index },
    "/books/new": get_books_new,
    "/books/validate": { POST: post_books_validate },
    "/books/:id/edit": { GET: get_books_edit, POST: post_books_edit },
    "/books/bulk-delete": { POST: post_books_bulk_delete },
};

export const route_definitions: RouteDefinition[] = [
    { url: "/user/books", crud: user_books_crud, nav_title_key: "user.books", module: "user" },
];

export async function get_books_index(req: BunRequest): Promise<Response> {
    const ctx = await create_ctx(req, import.meta.dir);
    const { query, offset, limit, order_by, scope, filters, filter_not } = parse_pagination_params(req.url);
    const limit_numeric = limit === "all" ? 999999 : limit;
    const global_scopes = await get_global_scopes(TABLE_NAME, "books", "");
    const scope_key = scope || get_cookie(req, "scope_books") || global_scopes.find((s) => s.is_default)?.scope_key || "";
    const scope_clause = scope_key ? await get_scope_clause(TABLE_NAME, scope_key, ctx, "books", "") : "";
    const raw_filter_definitions = get_filter_definitions(columns, fields);
    const filter_clauses = resolve_filters(raw_filter_definitions, filters, filter_not);
    const result = await search_records(query, offset, limit_numeric, order_by, scope_clause, filter_clauses);

    return render("index", {
        data: { records: result.records, query, offset, limit, order_by, total: result.total, columns, enable_delete },
        ctx,
    });
}
The books module uses offset pagination with search, sortable columns, filters, and global scopes. Set pagination_strategy: "cursor" in config.ts to use the keyset variant instead. See Pagination.
Open apps/main/user/books/sql.ts for the queries - get_record_by_id, get_all_records, search_records, create_record, update_record, delete_record. search_records runs through the Redis cache (a no-op unless CACHE_ENABLED); the write functions call cache.invalidate(TABLE_NAME). The functions are typed against the row shape that schema.generated.ts exports.
Open apps/main/user/books/index.ree for the list template, apps/main/user/books/form.ree for the form. Both use the shipped form components and the validation flow, so they're concise - most of the markup is the page chrome.
The output is meant to be edited. Generated files are written once unless you re-run with --force; your edits stick.
Step 5: Customise a Field
The published_on field is currently a <input type="date">. The customisation point is apps/main/user/books/config.ts, where the grid configuration is a field map:
// config.ts
export type { books_type } from "./schema.generated";
export { v_fields, fields, indexed_columns } from "./schema.generated";

const columns = {
    checkbox: { width: "10ch", class: "text-center" },
    id: { width: "10ch", class: "" },
    title: { width: "auto", class: "", domain: "text_block" },
    author: { width: "auto", class: "", domain: "text_block" },
    isbn: { width: "auto", class: "", domain: "text_block" },
    published_on: { width: "20ch", class: "", domain: "date_only" },
    is_in_stock: { width: "15ch", class: "text-center", domain: "boolean" },
};

const route_param = "id";
const enable_delete = false;
const pagination_strategy: "cursor" | "offset" = "offset";
const render_strategy: "stream" | "load" = "load";

export { columns, route_param, enable_delete, pagination_strategy, render_strategy };
columns controls each grid field. Adjust the width for the title while retaining the field map:
title: { width: "40ch", class: "", domain: "text_block" },
Save, refresh the list page, the columns rebalance. No restart needed - the dev server picks up the change.
Use grid: false on a column to keep it filterable while hiding it from the index grid. The list template reads props.columns[field_name] for the generated cells.
Step 6: Add Custom Validation
The generated Zod schema in validation_server.ts covers the Books shape. The same file exports validate_touched() for the /user/books/validate endpoint, which displays inline errors as fields are touched:
export const schema = z.object({
    id: z.coerce.number().optional(),
    title: z.string().min(1, "title_required"),
    author: z.nullable(z.string().optional()),
    isbn: z.nullable(z.string().optional()),
    published_on: z.nullable(z_date_optional),
    is_in_stock: z.nullable(z.coerce.number().min(0, "is_in_stock_required").optional()),
});

export const validate = (data: any, messages?: Record<string, string>) => {
    return validate_schema(schema, data, undefined, messages);
};

export const validate_touched = (data: any, touched: string[], messages?: Record<string, string>) => {
    return validate_schema(schema, data, touched, messages);
};
The current books schema requires a title and an in-stock selection. Add the matching validation keys to the books namespace's {locale}.json file:
// apps/main/user/books/en-us.json
{
    "errors": {
        "title_required": "Title is required",
        "is_in_stock_required": "Select whether this book is in stock"
    }
}
Run bun reeman sync-translations --translate to fill the missing keys across locales - it scans the JSON files and AI-translates anything missing, writing the results back to the files.
Step 7: Add to the Navigation
The shipped layout's left-hand nav is built from nav_routes, which build_nav_routes() derives from the same RouteDefinition array that builds the route table. The generated books module joins that array through its exported route definitions:
// apps/main/routes.ts
import { route_definitions as user_books } from "$main/user/books";

const route_definitions: RouteDefinition[] = [
    // ...
    ...user_books,
];
Add the navigation label to the books namespace's {locale}.json file:
// apps/main/user/books/en-us.json
{
    "nav": "Books"
}
The layout's left-hand nav shows a "Books" entry when the books route definition includes its navigation title key. To group it under a module heading (e.g. an admin section), add module: "admin" to the exported books route definition.
Step 8: Walk the Whole Flow

In the browser, click through the actions:
- List at
/user/books- search for "Dune", confirm the result filters down. - New -> fill in a fake book -> save. The redirect lands on
/user/bookswith the toast confirmation. - Edit any row → change the title → save. The list reflects the new title.
- Edit with bad data - try an ISBN of "abc" - confirm the inline validation error appears as you tab off the field, and the form doesn't submit.
- Try a duplicate ISBN - the unique-index violation surfaces as a "duplicate" form error from the database error handler.
- Confirm there is no delete action. The demo sets
enable_delete = false.
If everything works, you have a fully functional CRUD module in roughly fifteen minutes.
What's Next
The same pattern scales to dozens of resources. A few directions to take it:
- Building an Admin Panel - continue with the admin-only Authors and Languages reference tables.
- Adding a New Locale - translate the module into another locale with auto-localised URLs.
- Custom Form Components - write a custom input for fields the standard set doesn't cover (a colour picker, a tag input, a rich-text editor).
- Foreign keys - add a
developer_idcolumn tobooksreferencing adeveloperstable, regenerate, and the form renders a dropdown populated from the related table. See Schema & Initialization.
The deeper docs to read once you're comfortable with the basic flow:
- Generators - the full reference for what the generator can do.
- Validation - the Zod schema layout, custom rules, the live-validation endpoint.
- Database - Querying - direct SQL when you need it.