Build a Self-Hosted Admin Panel with Bun
This recipe builds an admin section in the Reepolee project you created during Installation. Run the commands below from that project's root folder.
The example uses modules as its authorization mechanism. Reference tables, Developers and Languages, live under /admin. Final tables, Frameworks and Books, live under /user. You will grant Alice the admin module through the Users CRUD, generate the reference-table resources, and register their navigation. The route builder turns each resource's module into the matching authorization guard.
Step 1: Assign the admin Module
Users have a modules_tags column - a comma-separated string of module codes from the modules table. The convention is "user" for everyone and "user,admin" for admins. Anyone whose modules_tags contains admin can reach /admin/* routes.
The installer deliberately does not create an all-powerful admin. It creates Alice with system,user and Bob with user. Sign in as Alice, open the system Users CRUD, edit Alice, and add admin to modules_tags.
sqlite3 app.db 'SELECT id, email, modules_tags FROM users'
The equivalent database change is useful for understanding the result, but the demo uses the Users CRUD:
UPDATE users SET modules_tags = 'system,user,admin' WHERE username = 'alice';
For a user-facing way to assign modules to others, see Authorization → Modules - the simplest pattern is letting an existing admin edit the modules_tags field on any user from a /admin/users form.
Step 2: Generate the Reference Tables
The Frameworks dataset in sql/sqlite/demos/05-frameworks.sql introduces Developers and Languages as reference tables. Generate both under the admin module:
bun reeman crud developers --prefix admin
bun reeman crud languages --prefix admin
The generator writes apps/main/admin/developers/ and apps/main/admin/languages/. Each module exports a CRUD object plus a route definition:
export const route_definitions: RouteDefinition[] = [
    { url: "/admin/developers", crud: admin_developers_crud, nav_title_key: "admin.developers", module: "admin" },
];
Three things to notice:
- The folder structure mirrors the URL.
apps/main/admin/developers/corresponds to/admin/developers/*. module: "admin"guards every handler. Anyone without theadminmodule is redirected to login or returned 403.- The export is named
admin_developers_crud, so its module is explicit in the central route table.
Visit /admin/developers after restarting and confirm:
- Logged out: redirect to
/login. - Logged in as a non-admin (
modules_tags = "user"):403 Forbidden. - Logged in as an admin: the list page renders.
Step 3: Register the Complete Demo Route Story
Your project's apps/main/routes.ts combines the four generated feature modules. The generated modules stay barrel-exported as route-definition arrays:
import { route_definitions as admin_developers } from "$main/admin/developers";
import { route_definitions as admin_languages } from "$main/admin/languages";
import { route_definitions as user_books } from "$main/user/books";
import { route_definitions as user_frameworks } from "$main/user/frameworks";

const route_definitions: RouteDefinition[] = [
    ...admin_developers,
    ...admin_languages,
    ...user_books,
    ...user_frameworks,
];
build_routes(route_definitions) applies the module guards. build_nav_routes(route_definitions) uses the same declarations to build navigation, so Alice sees admin links only after adding admin to herself.
To generate a new admin resource, re-run with the prefix flag:
bun reeman crud developers --prefix admin
The generator writes the new files, adds the import line, and your existing mount_prefix call expands to cover the new module.
Step 4: A Separate Admin Layout
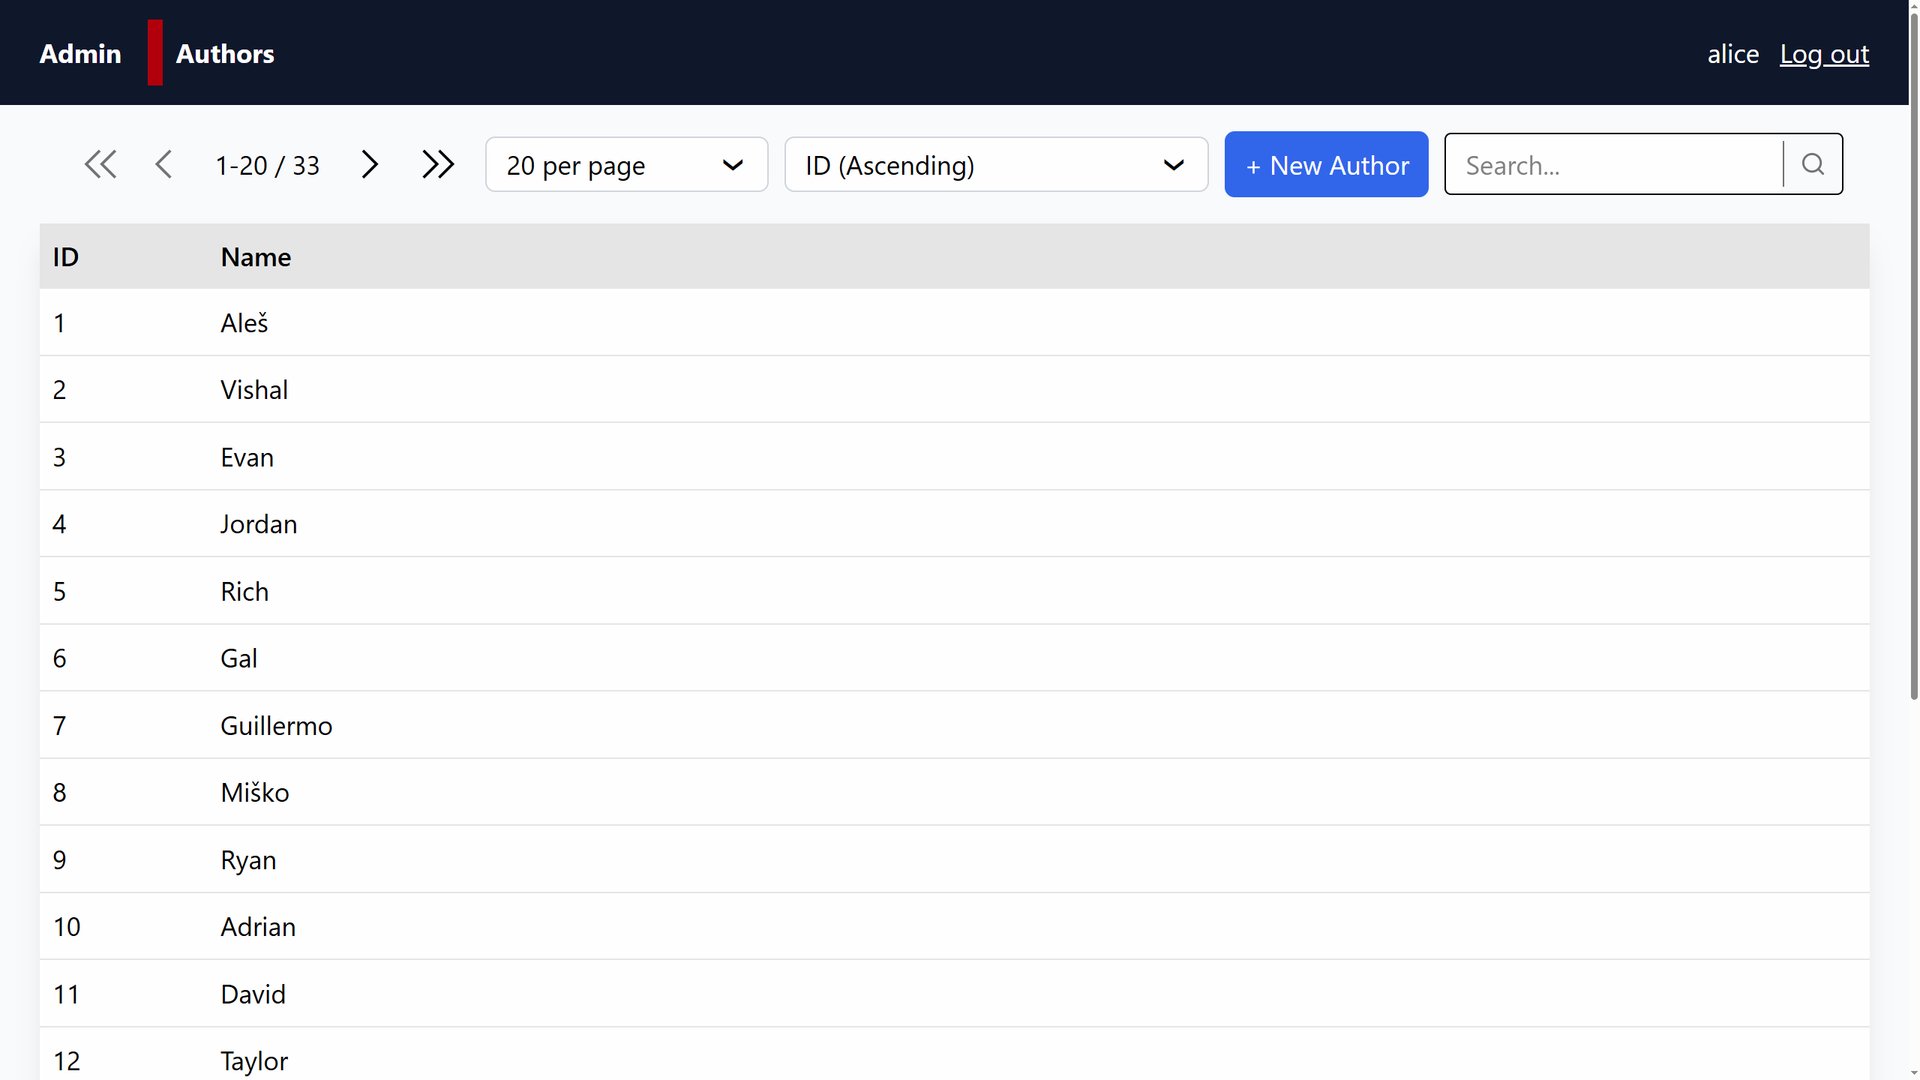
The shipped apps/main/layout.ree is the public layout. For an admin section that should look distinct - different navigation, an "ADMIN" badge in the header, a more dense interface - create a second layout:
<!-- views/admin-layout.ree (or apps/main/admin/layout.ree, your choice) -->
<!DOCTYPE html>
<html lang="{= props.locale }">
    <head>
        <meta charset="UTF-8" />
        <title>Admin · {_ ui.title }</title>
        <link rel="stylesheet" href='/app{~ props.is_dev ? "-dev" : "" }.css?v={= props.version }' />
        <script src="/web-components/validation-error.js" defer></script>
        <script src="/web-components/toasts-area.js" defer></script>
    </head>
    <body class="bg-slate-50">
        <header class="bg-slate-900 text-white px-6 py-3 flex items-center gap-4">
            <span class="font-bold">Admin</span>
            <nav class="flex gap-3 text-base">
                <a href="/admin/developers" class="{= is_current('/admin/developers') }">Developers</a>
            </nav>
            <div class="ml-auto text-base">
                {= props.user.username }
                <form method="POST" action="/logout" class="inline">
                    <button class="ml-2 underline">Log out</button>
                </form>
            </div>
        </header>

        <main class="px-6">{~ props.body }</main>

        <toasts-area></toasts-area>
    </body>
</html>
Then in each admin template, reference the admin layout instead of the default:
<!-- apps/main/admin/books/index.ree -->
{#layout('admin-layout') }

<h1 class="text-2xl font-bold mb-4">{_ ui.title }</h1>
<!-- ... rest of the list -->
Or - if you'd prefer not to edit every generated template - wrap the render() call in a small helper:
// apps/main/admin/render.ts
import { render } from "$lib/render";
import type { RenderOptions } from "$lib/render";
import type { BunRequest } from "bun";

export function admin_render(template: string, options: RenderOptions): Promise<Response> {
    return render(template, {
        ...options,
        data: { ...(options.data ?? {}), layout: "admin-layout" },
    });
}
Then in the templates, reference props.layout dynamically:
{#layout(props.layout ?? 'layout') }
The handler-side admin_render overrides props.layout; everything else uses the default. You don't have to touch every template.
Step 5: Adding Non-CRUD Admin Pages
Most admin sections need pages that aren't a CRUD module - a dashboard, a settings overview, a system status page. Add them as plain handlers in apps/main/admin/:
// apps/main/admin/dashboard/index.ts
import { resolve_session, require_module } from "$platform/auth/middleware";
import { render } from "$lib/render";
import { create_ctx } from "$lib/request_context";
import type { BunRequest } from "bun";

import { count_books } from "$main/admin/books/sql";
import { count_active_users } from "$main/admin/users/sql";

export async function get_admin_dashboard(req: BunRequest): Promise<Response> {
    const ctx = await create_ctx(req, import.meta.dir);
    const auth_ctx = await resolve_session(req);
    const guard = require_module(auth_ctx, "admin");
    if (guard) return guard;

    return render("admin/dashboard/index", {
        data: {
            ui: { title: "Admin Dashboard" },
            stats: {
                books: await count_books(),
                users: await count_active_users(),
            },
        },
        ctx,
    });
}

export const dashboard_routes = {
    "/dashboard": get_admin_dashboard,
};
Then add it to the admin section in routes.ts:
import { dashboard_routes as admin_dashboard_routes } from "$main/admin/dashboard";

export const routes = {
    // ...
    ...mount_prefix(
        "/admin",
        {
            ...admin_dashboard_routes,
            ...admin_books_crud,
            ...admin_developers_crud,
        },
        require_module_mw("admin"),
    ),
};
Visit /admin/dashboard - the function-form require_module and the middleware require_module_mw both run, so the check is doubled but harmless. For purely non-CRUD pages, you can drop the in-handler guard and rely on the middleware alone:
export async function get_admin_dashboard(req: BunRequest): Promise<Response> {
    // No resolve_session / require_module - middleware handles it
    const ctx = await create_ctx(req, import.meta.dir);
    // ... but you also lose access to auth_ctx.current_user here
}
The trade-off is what's covered in Authorization → Which Form to Use. For dashboards that need current_user (showing the admin's name in the page title), the function-form guard is worth keeping.
Step 6: Tables That Should Only Exist in Admin
A users table is one example - there's no public /users page, but there's an /admin/users for admins to manage accounts. The generator handles this directly: pass --prefix admin and only the admin module exists.
For tables that should exist publicly and in admin (a posts table where the public sees published posts and admins manage all posts), generate both:
bun reeman crud posts                # public, at /posts
bun reeman crud posts --prefix admin # admin, at /admin/posts
The two modules share the database table and the sql.ts patterns but are separate route folders. Customising one doesn't affect the other - useful when the public and admin views diverge significantly.
Step 7: Beyond a Single "admin" Module
The admin module is a single bit - either you can do everything or you can do nothing. For larger applications you'll want finer permissions: a billing module for the billing section, an editor module for content management, an analytics module for the dashboard. Add new module codes to the modules table and assign them to users via modules_tags.
Each mount_prefix can use a different module check:
export const routes = {
    "/": home_page,
    // ...
    ...mount_prefix("/admin", admin_general_routes, require_module_mw("admin")),
    ...mount_prefix("/billing", billing_crud, require_module_mw("billing")),
    ...mount_prefix("/content", content_crud, require_module_mw("editor")),
    ...mount_prefix("/analytics", analytics_routes, require_module_mw("analytics")),
};
A user with modules_tags = "user,billing,editor" reaches /billing/* and /content/* but not /admin/* or /analytics/*. Each section is gated independently.
For role hierarchies (an admin who can do everything plus their own modules), check both in your handler or compose middleware:
import { with_middleware, require_module_mw } from "$lib/middleware";

const require_admin_or_billing = (handler: Handler) =>
    with_middleware(handler, async (req, next) => {
        const auth_ctx = await resolve_session(req);
        const modules = (auth_ctx.current_user?.modules_tags ?? "").split(/[\s,]+/).filter(Boolean);
        if (modules.some((m) => ["admin", "billing"].includes(m))) {
            return next(req);
        }
        return new Response("Forbidden", { status: 403 });
    });
Custom middleware composes the same way as the built-ins. For a project with three or four roles, this stays manageable; for many roles, a user_roles table and a real RBAC layer is the next step.
What's Next
You have a working admin panel with auth, prefixed routes, a separate layout, and the start of a fine-grained permissions story. Reading from here:
- Authorization - the full reference for
require_module_mw,require_auth, and writing custom middleware. - Generators - every flag and convention the generator supports.
- Custom Form Components - when the standard inputs aren't enough for your admin forms.
- Adding a New Locale - translating the admin alongside the public side.